
My girls share a room which comes with its benefits and drawbacks. As they are getting a little older an issue that has become quite a problem is that one of my girls is very tidy and clean and the other…. well she isn’t. My clean queen will spend a bunch of time, unprompted by me, with Alexa playing her favorite songs, merrily cleaning their room.. only to come back an hour later (wanting to hang in her serene space) and its a mess!
To give them each their own space I hung a room divider curtain from the ceiling separating their two sides of the room. They can each live comfortably how they choose from day to day! My tidy girl can feel at peace on her put together side and my dreamer can come and go without spending her whole day sidetracked on what goes where.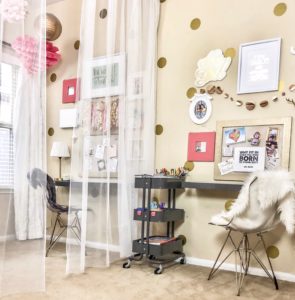
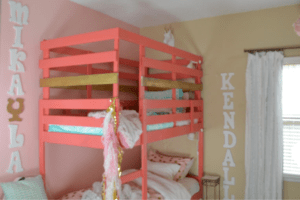
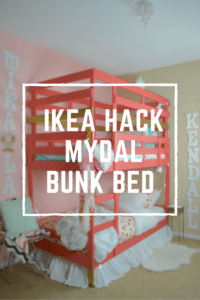
The girls LOVE the finished product! They can open and close the curtains extremely easily. The curtains glide like butter down that wire! Using the ceiling, rather than walls to hang the curtains from worked out great in this room. That way the curtains could start at the wall in between their desks and could end when it reached their bunk bed. If you are interested in seeing how I made their bunk bed from an IKEA Mydal Bunk Bed click here.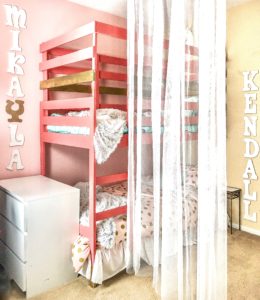
Here are the nitty gritty details for you if you are thinking of doing this project in your home: I used the Dignitet Curtain Wire System from Ikea which cost $15 for the wire and the brackets, $16 for 2 packs of clips to hang the curtain from the wire, and $10 for 2 panels of the mesh curtains. I did have to end up spending $40 to get a better wire cutter than the one I had. Turns out a good wire cutter is an important tool in this project. In order to be able to thread the wire through the bracket you must be able to clip a crisp cut, in the wire to your desired length. If you use an old dull wire cutter (like I did at first) the threads of the wire will come all unraveled and not fit into the teeny tiny hole in the bracket. Just goes to show what all the project junkies know; that every project requires a new tool which inevitably costs about as much as the actual materials for the project, ha! Oh well.. one more project, one more tool for the ever-growing collection.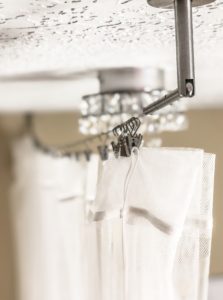
The girls love that they can still see and talk to each other with the curtains closed but each have a well defined space to call their own. Successful project!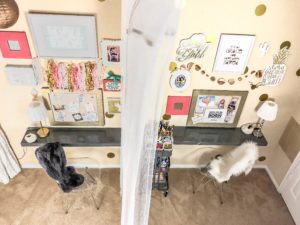
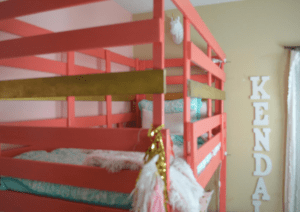
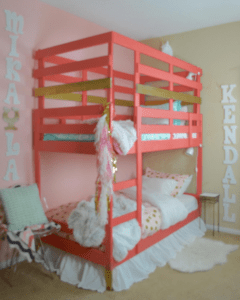 Our girls were ready to move into a bunk bed, but we ran across a couple of issues with them. First, we cringed at the thought of getting rid of the really nice traditional mattress they already had- just to buy a cheap, thin & less comfortable bunk bed mattress. Secondly, am I the only mama who gets nervous looking at the short safety rails on the top bunks of ALL bunk beds? Well, worry no longer. This Ikea Mydal bunk bed hack will both: Fit a traditional twin mattress/box spring set & add a fort to the top bunk. Here is how to do the Ikea Bunk Bed Hack..
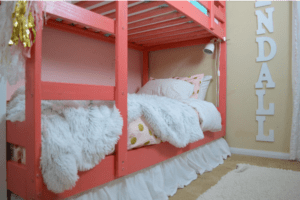
 The bottom bunk has no weight limit, since the mattress & box spring rest on the ground. This big regular mattress is crazy comfortable! My girls and I all lay in there together and read books, or listen to a song together, chill, & snuggle.
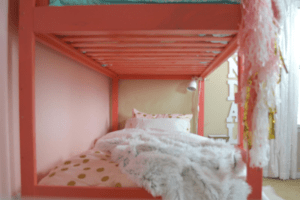
 Above all, I love working on the kids’ rooms! Their reactions are priceless! ..Now if only hubby got that excited about my projects throughout the rest of the house;) Happy decorating!!